

The recommended path is simple: use enhanced conversions for leads through Google Ads Data Manager as your default method for importing offline conversions, and reserve the Google Ads API for cases where volume or system complexity demands programmatic control. This method wins on match durability, feeds Smart Bidding cleaner signals, and supports scheduled uploads instead of one-off manual files.
Why this matters practically: legacy GCLID-only imports still work, but Google has been steering advertisers toward hashed first-party data because it survives cookie loss and cross-device gaps that a raw click ID can’t handle on its own. Before you touch a template or write a line of code, do one thing first: confirm your tags fire correctly and verify that your CRM can actually store a GCLID or a normalized, hashable user identifier (email or phone) at the moment a lead comes in.
- Confirm auto-tagging is on in Google Ads so GCLIDs generate automatically.
- Add a CRM field to store GCLID and/or hashed email/phone before you build any upload pipeline.
- Decide now whether you’re importing via Data Manager, API, or manual CSV, since this shapes every step that follows.
Key Takeaways
Enhanced conversions for leads through Google Ads Data Manager gives Smart Bidding durable, hashed identifiers that outlast a stale GCLID and improve attribution across devices.
| Point | Details |
|---|---|
| Choose the right method | Use manual upload for testing, Data Manager for scheduled recurring imports, and the API only for high-volume programmatic needs. |
| Capture GCLID at first interaction | Store it in a hidden form field and a dedicated CRM field the moment a lead is created, not at a later thank-you page. |
| Normalize before hashing | Lowercase emails, format phone numbers to E.164, then apply SHA-256, since hashing raw data causes mismatches. |
| Expect a three-hour delay | Check the “All conv. (by conv. time)” column rather than assuming a missing number means the upload failed. |
| Get expert implementation help | Growthreachmarketing audits tag setup, builds CRM-to-Google Ads connections, and reconciles offline conversions import data for appointment-driven businesses. |
Official Docs and Useful Links for Quick Reference
The templates and reference docs below cover both the CSV/Sheets side and the programmatic side of offline conversions import.
- About offline conversion imports — overview and Data Manager migration guidance.
- Set up offline conversions using GCLID — GCLID capture and CRM setup steps.
- Guidelines for importing offline conversions — timing windows and Data Manager connector details.
- Manage offline conversions | Google Ads API — ClickConversion objects, batching, and partial_failure handling.
- Enhanced conversions guidance — why Google recommends migrating from legacy imports.
- Google Ads integrations and automated uploads — Zapier and CRM connector references, including HubSpot.
Table of Contents
- What Is Offline Conversions Import and Why Does It Matter?
- What Are the Main Ways to Import Offline Conversions?
- What Do You Need Before You Start Importing?
- How Do You Format and Hash Your Conversion Data?
- How Do You Actually Upload Offline Conversions?
- What Are Enhanced Conversions for Leads and Why Do They Matter?
- How Do You Capture and Store GCLID Data Correctly?
- Why Do Uploads Fail and How Do You Fix Them?
- What Privacy Rules Apply to Offline Conversions Import?
- What Does an Agency-Tested Import Checklist Look Like?
- How Growth Reach Marketing Handles Offline Conversions Import for You
- Frequently Asked Questions
- Sources
What Is Offline Conversions Import and Why Does It Matter?
Offline conversions import is the process of linking a real-world business outcome, a phone sale, a booked appointment, an in-clinic purchase, back to the Google Ad click that started it. Without this link, Google Ads sees the click and maybe a form fill, then nothing. The actual sale happens somewhere else: a phone call, a front-desk booking system, a CRM deal stage. Google’s own documentation frames offline conversion import as the mechanism that closes that loop, attributing offline actions back to the originating ad click.
Once that loop closes, bidding gets smarter. Smart Bidding strategies optimize toward whatever signal you feed them. If all they see is “form submitted,” they’ll chase form submissions, even the ones that never turn into paying customers. Feed them actual sales data instead, and they start optimizing toward revenue, not just lead volume.
This shows up clearly in a few recurring business types:
- Appointment-based businesses (salons, clinics, med spas) where the booking happens by phone or in person, not on a landing page.
- Phone sales teams where a call center or receptionist closes the deal well after the click.
- High-value B2B deals with sales cycles running weeks or months past the original ad click.
- In-store closures where a customer researches online and buys in person.
The core entities you’ll work with throughout this process are the Google Ads account itself, the GCLID (Google Click ID), the offline conversion action you configure inside Google Ads, and, increasingly, enhanced conversions for leads as the preferred data format for feeding it all back in.
What Are the Main Ways to Import Offline Conversions?
Four practical paths exist, and picking the wrong one for your scale is the most common early mistake teams make.
- Manual CSV or Google Sheets upload through the Google Ads UI. One-time, no code, fine for small batches or a first test run.
- Scheduled imports via Google Ads Data Manager, which pulls data on a recurring basis from Google Sheets, HTTPS, SFTP, or supported connectors like HubSpot and Salesforce.
- Google Ads API (programmatic uploads), where your engineering team builds direct integration for high-volume, automated pipelines.
- Third-party connectors such as Zapier or native CRM integrations, which sit between your CRM and Google Ads without requiring in-house API work.
Frequency is the deciding factor. A single manual upload works for testing or a small batch of historical sales. Anything recurring belongs in Data Manager, which Google positions as the recommended way to import and activate first-party data on a schedule rather than a one-off basis. Technical complexity rises in that same order: manual upload is low effort, Data Manager sits in the middle, and full API integration demands genuine engineering resources and ongoing maintenance. If you’re a solo marketer running a single clinic account, start with manual upload to validate your data, then graduate to Data Manager once you trust the pipeline. If you’re managing offline conversions import across dozens of client accounts, the API is worth the build.
What Do You Need Before You Start Importing?
Skipping prerequisites is the single biggest reason offline conversion imports fail on the first attempt. Work through this checklist in order before you build or upload anything.
-
Create your offline conversion action inside Google Ads. Navigate to Tools and Settings, then Conversions, and add a new offline conversion action. Choose the right category (sale, lead, or booked appointment) and decide whether it counts as primary (feeds into bidding directly) or secondary (measurement only, doesn’t influence Smart Bidding).
-
Verify auto-tagging is enabled. Without it, Google Ads won’t append a GCLID parameter to your destination URLs, and nothing downstream works. This lives under account settings and takes thirty seconds to check.
-
Identify who holds API access, if you’re going that route. Programmatic uploads require a developer token tied to your manager account, and Google’s developer documentation walks through the credential setup. Know who on your team owns this before you need it urgently.
-
Plan exactly where GCLID or user identifiers get captured and stored. This usually means a hidden form field that grabs the GCLID from the URL parameter, paired with a corresponding custom field in your CRM. Decide this at the form level, not after your CRM is already collecting leads without it.
-
Sort out manager-account and cross-account linking if you’re uploading conversions for multiple client accounts from a single agency-level connection. Data Manager and the API both support this, but the permissions have to be set up correctly first.
-
Respect timing rules. A freshly created conversion action needs roughly 4 to 6 hours before it’s ready to accept uploads. Attempt an upload too soon and you’ll get rejected records with no clear explanation, which sends people down a debugging rabbit hole for a problem that resolves itself with patience.
-
Check upload windows for your chosen connector. Google’s guidelines note that conversions older than a connector-specific window won’t import at all, and those windows differ by source. Historical data older than the allowed window is simply lost to the system, so don’t wait months to backfill old sales.
Salons and clinics juggling booking software alongside Google Ads often find the conversion-action setup is the part that trips people up first; a guide built specifically around conversion actions for salon owners walks through the category choices in more practical terms.
How Do You Format and Hash Your Conversion Data?
Google Ads expects specific columns, specific formatting, and, for scheduled uploads, specific hashing before it will accept a single row. Get this wrong and you won’t see an error message that clearly explains why; you’ll just see rejected rows or, worse, silent non-matches.
The core columns for both the “Conversions from clicks” template and the enhanced conversions for leads template look like this:
| Column | Purpose | Format notes |
|---|---|---|
| Google Click ID | Links the conversion to the originating click | Case-sensitive, copy exactly as captured |
| Conversion Name | Matches the offline conversion action in your account | Must match exactly, including spacing |
| Conversion Time | Timestamp of the offline event | Format: `yyyy-mm-dd hh:mm:ss+ |
| Conversion Value | Revenue or deal value, if tracked | Numeric, no currency symbol |
| Time Zone | Time zone of the conversion timestamp | Required for accurate attribution |
| Order ID | Unique identifier for deduplication | Recommended, not always required |
| Email or Phone (hashed) | User identifier for enhanced conversions | SHA-256 hash after normalization |
Normalization has to happen before hashing, and the rules are strict: lowercase every email address, strip spaces, strip punctuation and leading zeros from phone numbers (E.164 format is the safe default), and trim whitespace from every field. Google’s own guidance is explicit that improper normalization is one of the most common causes of poor match rates, because a hash of John@Email.com and a hash of john@email.com are two completely different strings.
On hashing itself: manual, one-time uploads through the Google Ads UI sometimes allow unhashed data, since Google will hash it for you during processing. Scheduled uploads through Data Manager are a different story. Google’s documentation states plainly that scheduled enhanced conversions for leads require user-provided data to be pre-hashed with SHA-256 before it ever reaches Google’s servers.
- Always lowercase and trim email addresses before hashing.
- Strip all non-numeric characters from phone numbers and format to E.164.
- Never hash before normalizing; hashing raw, inconsistent data guarantees mismatches.
- Double-check your time zone field matches the time zone your CRM actually logs events in.
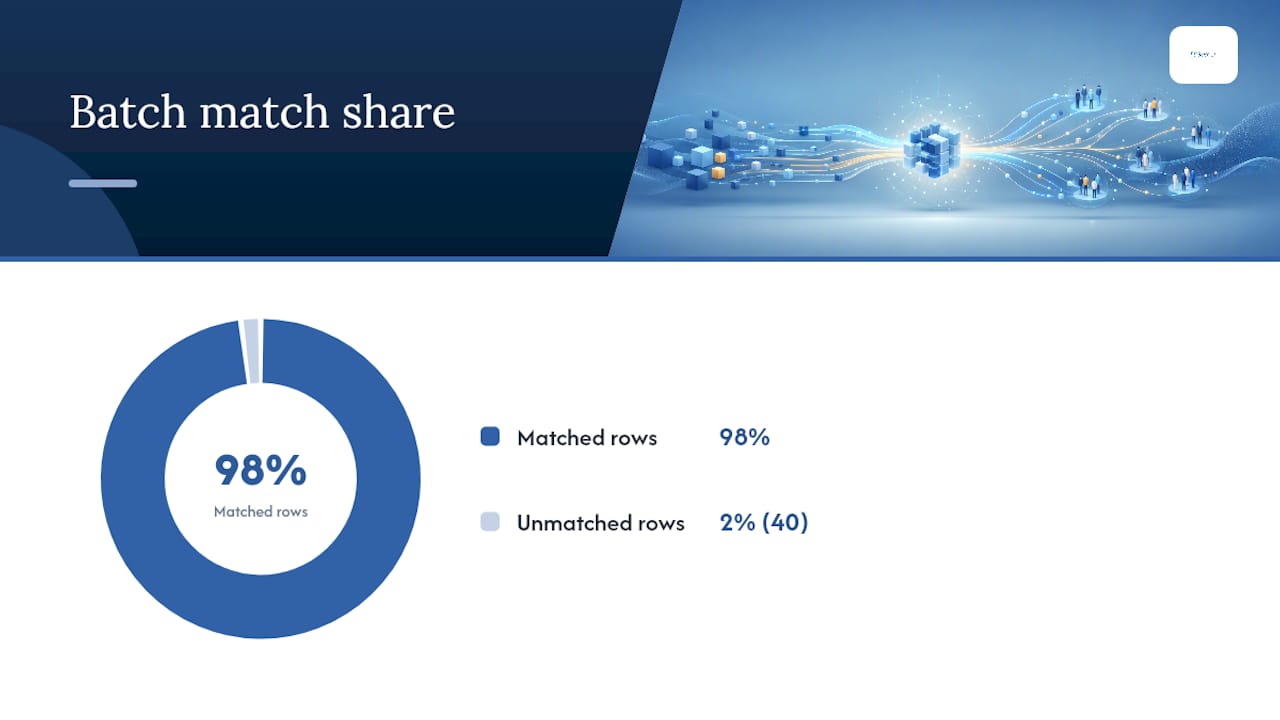
Pro Tip: Include order_id in every upload, even when it feels optional. It’s the fastest way to reconcile a batch against your CRM later, and it saves hours when you’re trying to figure out why 40 rows out of 2,000 didn’t match.
How Do You Actually Upload Offline Conversions?
Each method has its own sequence, and mixing up the steps is where most of the friction happens.
Manual CSV or Sheets upload:
- Go to Tools and Settings, then Uploads, inside your Google Ads account.
- Select the correct template (“Conversions from clicks” or the enhanced conversions for leads template) and download it to match your headers exactly.
- Fill in your data following the normalization rules above, then upload the file.
- Use the built-in Preview feature before finalizing. This surfaces formatting errors, mismatched conversion names, and obvious problems without committing bad data to your account.
- Fix flagged rows and re-upload; don’t submit a file with known errors hoping Google will silently skip them.
Scheduled imports through Data Manager:
- Connect a source: Google Sheets, HTTPS endpoint, SFTP server, or a supported connector like HubSpot or Salesforce.
- Set your schedule (daily is common for appointment-driven businesses).
- Authenticate the connection, which for connectors usually means an OAuth flow rather than manual credentials.
- Data Manager handles date ranges differently depending on the connector, so check the specific connector’s documentation for how far back it will pull on the first sync.
API / programmatic uploads:
- Build ClickConversion objects containing the GCLID or hashed identifiers, conversion action resource name, conversion time, and value.
- Batch requests rather than sending one conversion per call. Google’s developer guide recommends batching for both performance and reliability.
- Use partial_failure mode so one bad row doesn’t kill an entire batch upload.
- Review the debug output for any partial_failure warnings before assuming the batch succeeded cleanly.
Whichever method you choose, stage a small test batch first, five or ten records, and confirm they appear correctly before scheduling a recurring job or greenlighting a full historical backfill. A Google Ads campaign structure guide is worth a read if you want the fuller picture of how these imported signals eventually flow into Smart Bidding decisions at the campaign level.
What Are Enhanced Conversions for Leads and Why Do They Matter?
Enhanced conversions for leads let you upload hashed first-party identifiers, typically email and phone, alongside or instead of a raw GCLID. Google’s documentation describes this as a way to improve attribution accuracy and support cross-device matching, since a hashed email survives situations where a GCLID simply doesn’t exist anymore (a different device, a cleared cookie, a delayed conversion weeks after the click).
That durability is the whole argument for switching. A GCLID-only import breaks the moment a customer clicks an ad on their phone and calls to book three days later from a different number not tied to that session. An enhanced conversion tied to their email address survives that gap. Google explicitly recommends this upgrade over legacy imports specifically because it enables more durable reporting along with features like cross-device and engaged-view conversions that GCLID-only data can’t support.
There’s a practical wrinkle worth knowing before you build anything: when you have both a GCLID and hashed user data for the same conversion, uploading both sometimes creates matching conflicts rather than redundancy. In cases where you’re seeing unexpected mismatches, try omitting the GCLID and letting the hashed identifiers carry the match on their own, particularly for older conversions where the click identifier might already be stale.
For teams without deep engineering resources, three integration patterns cover most real-world setups:
- Google tag / Google Tag Manager plus Data Manager for websites that already run standard conversion tracking and want to layer in hashed lead data at form submission.
- CRM connectors like HubSpot, which can map deal stages directly to Google Ads conversion actions without custom code.
- Middleware like Zapier, which watches for a CRM event (“Deal Won,” for instance) and pushes a formatted conversion to Google Ads automatically.
How Do You Capture and Store GCLID Data Correctly?
The GCLID has to survive the gap between a click and whatever offline event eventually happens, and that gap can be minutes or months. Most implementation failures happen here, not in the upload itself.

The standard client-side pattern: capture the GCLID from the URL query parameter on landing, store it in a cookie or local storage so it persists across pages, then copy it into a hidden form field right before the user submits. On the CRM side, that hidden field needs a dedicated custom field to land in, tied to the lead record from the moment it’s created. Pairing that GCLID field with an order_id or lead_id in the same record makes reconciliation dramatically easier down the line.
For server-side rendered pages or sites with heavy redirect chains, the capture script needs to run consistently on every entry page a paid click could land on, not just the homepage. A lot of teams use Google Tag Manager specifically to standardize this collection so it isn’t dependent on a developer remembering to add a snippet to every new landing page.
The pitfalls that show up again and again:
- Inconsistent field names across forms. One landing page calls it
gclid, another calls itgoogle_click_id, and now your CRM export has two columns that should be one. - Case sensitivity issues. GCLIDs are case-sensitive strings; a CRM that lowercases text fields on save will quietly break every match.
- Lost GCLIDs on redirects. A redirect from a landing page to a booking page can drop the query parameter entirely if it isn’t explicitly passed along.
- Late capture. Waiting until a “thank you” page to grab the GCLID misses users who convert by phone before ever reaching that page.
Google’s own setup guidance is blunt about this: the most common operational failure isn’t an API mistake, it’s losing the GCLID before it ever reaches the CRM. For teams running this without dedicated engineering, a Zapier flow that watches a CRM stage change and formats the record for upload is often the fastest path to something reliable, and a HubSpot connector handles the field mapping without custom code on either side.
Pro Tip: Run one end-to-end test lead through your entire funnel, click the ad, submit the form, check the CRM field, before you trust the pipeline with real customer data. It takes ten minutes and catches problems that would otherwise surface weeks later as a mystery gap in your reporting.
Why Do Uploads Fail and How Do You Fix Them?
The Preview feature inside Google Ads is your first line of defense, and skipping it is how small formatting mistakes turn into hours of confused debugging later. Run every file through Preview before committing it, no exceptions.
The errors that show up most often, and what they usually mean:
- CLICK_NOT_FOUND: the GCLID in your file doesn’t match any recorded click, often because it’s stale, mistyped, or from outside Google’s lookback window.
- Format or time parsing errors: your Conversion Time column doesn’t match the required
yyyy-mm-dd hh:mm:ss+|-hh:mmformat exactly. - Duplicate-conversion errors: the same GCLID, conversion name, and timestamp appearing twice. Each event for the same click needs a distinct timestamp, or Google Ads treats the second one as a duplicate and rejects it.
- Mismatches from malformed hashed data: a hash that doesn’t correspond to any known normalized value, usually because normalization happened after hashing instead of before.
Work through problems in this order:
- Recheck normalization and hashing on any rejected hashed-identifier rows first, since this is the single most common root cause.
- Confirm the conversion_action and customer_id referenced in the file actually match your account setup.
- If GCLID and hashed data conflict on the same row, retry with hashed data alone and drop the GCLID.
- Wait for the data to settle before panicking about totals. Google notes that imported conversions typically take about three hours to appear in reports, so check the “All conv. (by conv. time)” column rather than the default conversions column, since it reflects the actual conversion date rather than the day you happened to upload the file.
One easy checklist to save time: verify your tag diagnostics, cross-check a sample of CRM records against what actually landed in Google Ads, review the file preview errors line by line, and read any API partial_failure warnings in full rather than skimming past them.
What Privacy Rules Apply to Offline Conversions Import?
Hashing isn’t optional for most scheduled imports, and it’s not just a Google requirement, it’s a genuine privacy safeguard. SHA-256 hashing has to happen after normalization (lowercase, trimmed, formatted correctly), because hashing raw, inconsistent data produces mismatches that look like broken imports but are actually broken formatting.
The rule of thumb on when you hash it yourself versus when Google does it for you: manual one-time uploads through the Google Ads UI sometimes accept unhashed data, since Google hashes it during processing. Scheduled uploads through Data Manager require pre-hashed data before it ever leaves your systems.
For readers operating under GDPR, a few practical habits matter more than legal theory:
- Send only the fields you actually need, email and phone are usually sufficient; don’t upload extra personal data “just in case.”
- Have a documented lawful basis for processing this data before you build the pipeline, not after.
- Use secure transport (HTTPS or SFTP) for every scheduled connection, never an unencrypted file transfer.
- Log consent status where your lawful basis depends on it, and keep a retention policy for how long CRM records hold GCLID and identifier data.
None of this replaces a proper legal review. Consult your compliance or legal team about jurisdiction-specific obligations before rolling out offline conversions import at scale.
What Does an Agency-Tested Import Checklist Look Like?
The following sequence reflects how a properly staged import actually gets rolled out, from first check to full confidence in the numbers.
- Confirm the conversion action exists and is set to biddable if you want it influencing Smart Bidding, or secondary if it’s for measurement only.
- Verify tags and GTM triggers are firing correctly on every relevant page, not just the homepage.
- Check that the CRM field for GCLID (or hashed identifiers) is present and actually populating on new leads, not just configured and empty.
- Run one sample record end-to-end before trusting the pipeline with a full batch.
- Use Preview on every upload, no exceptions, even for a connector you’ve used successfully before.
- Watch CLICK_NOT_FOUND rates on the first few uploads; a high rate usually points to a capture problem upstream, not an upload problem.
- Confirm your time windows match your connector’s rules, since older records outside the allowed window simply won’t import.
- Check for duplicate timestamps if you’re uploading multiple events tied to the same GCLID.
- Confirm data appears under “All conv. (by conv. time)” rather than assuming a missing number means the import failed.
- Monitor Smart Bidding behavior for roughly 72 hours after a new signal type starts flowing in, since the algorithm needs time to absorb it.
Pro Tip: Prefer email as your primary user identifier when you have a choice between email and phone. Match rates tend to run higher on email, and for large files, schedule your daily import during low-traffic hours to avoid any processing delays colliding with live campaign activity.
Client-Facing Perspective: What Actually Happens After You Turn This On
Salons and clinics that finally attribute phone bookings back to the keyword that generated them usually see the same pattern: a period of confusion followed by clarity. One keyword that looked expensive and unproductive turns out to be the one driving the highest-value bookings, just never showing up as a “conversion” because nobody ever filled out a form.
Expect short-term noise before you see the upside. Smart Bidding recalibrates when it starts absorbing a new signal type, and CPA or ROAS numbers can wobble for a couple of weeks before settling into something better than your pre-import baseline. That’s normal, not a sign something’s broken.
Budget real time for the unglamorous part: an initial debugging window, then ongoing QA to catch the CRM field that quietly stopped populating three weeks after launch. Order_id consistency between your CRM and your uploads is what makes that kind of drift catchable instead of invisible.
How Growth Reach Marketing Handles Offline Conversions Import for You
For salons, clinics, and beauty brands, the gap almost always sits between the booking system and the ad account, not inside Google Ads itself. Growthreachmarketing builds that connection directly: auditing your current tag setup, adding the CRM fields needed to capture GCLID or hashed identifiers, and configuring Data Manager or API uploads so your offline conversions import runs on a schedule instead of depending on someone remembering to export a CSV.
What that looks like in practice: hands-on GTM and form-level implementation, a reconciliation protocol that checks your CRM records against what Google Ads actually received, and ongoing monitoring so a dropped field or a broken sync gets caught in days, not months. This is the same connective work covered in the Google Ads campaign structure guide, applied directly to your account rather than left as a general reference.
If your appointment bookings, phone sales, or in-clinic purchases still aren’t showing up as conversions in Google Ads, request an audit through Growthreachmarketing’s Google Ads services and get a clear read on what’s missing before you build anything further.
Frequently Asked Questions
Is offline conversions import the same as enhanced conversions for leads?
No. Offline conversions import is the general process of feeding real-world events back to Google Ads. Enhanced conversions for leads is the recommended data format for doing it, using hashed identifiers instead of relying solely on a GCLID.
How long does it take for an imported conversion to show up in reports?
Roughly three hours after upload. Check the “All conv. (by conv. time)” column, since imported events are logged by the original click date, not the upload date.
Can I upload offline conversions without a developer?
Yes. Manual CSV upload through the Google Ads UI requires no code, and connectors like HubSpot or Zapier handle scheduled imports without engineering resources.
What’s the biggest reason offline conversion imports fail?
Losing the GCLID before it reaches the CRM, usually from a missing hidden form field, inconsistent field naming, or a redirect that drops the URL parameter.
Do I need to hash my data before uploading?
For scheduled uploads through Data Manager, yes, using SHA-256 after normalizing the data. Manual one-time uploads sometimes accept unhashed data, since Google hashes it during processing.
Sources
- Manage offline conversions | Google Ads API
- About offline conversion imports – Google Ads Help
- Guidelines for importing offline conversions – Google Ads Help